If you struggled like me to find an updated tutorial for adding the Google Search Console TXT script to your website via Bluehost, you are not alone. Allow my trial and error to save you some time verifying your Google Search Console property.
Once here, copy and paste your domain into the “Domain” box on the left and click continue.
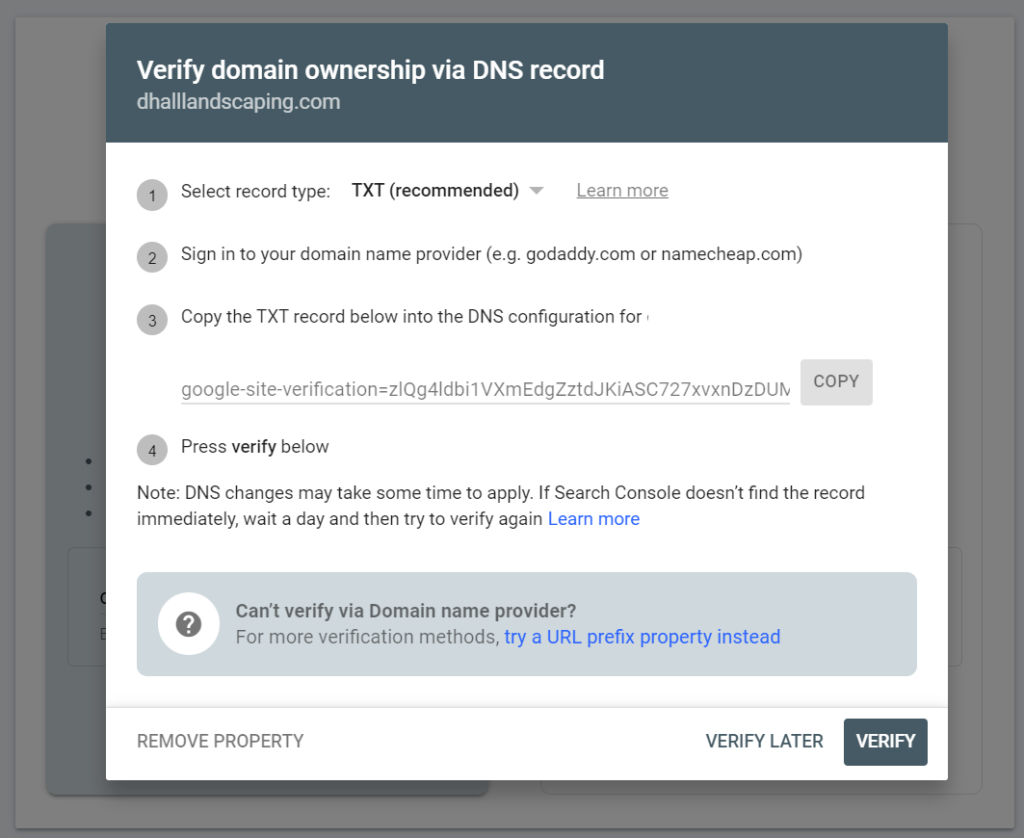
Assuming you do not already have Search Console set up yet, you will get a popup that looks like this:
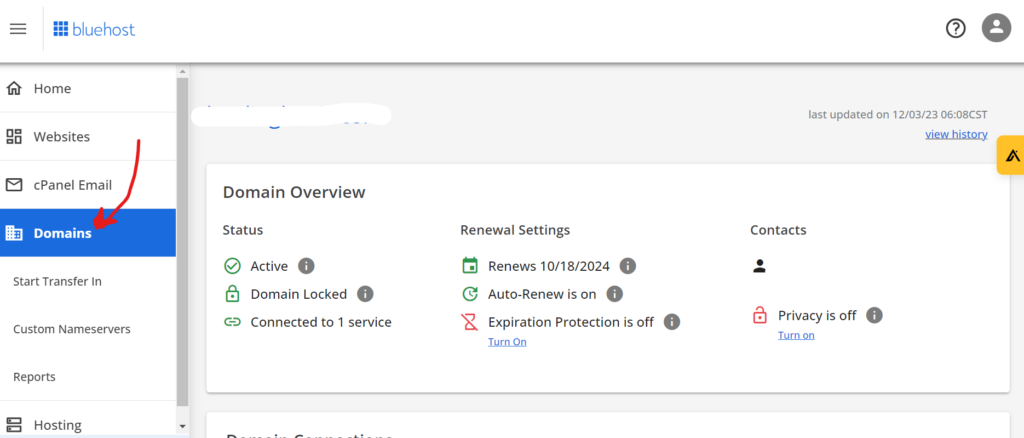
Copy the TXT snippet that is shown, and open a new window to login into your Bluehost dashboard and click on the”Domains” dropdown on your left hand navigation bar.
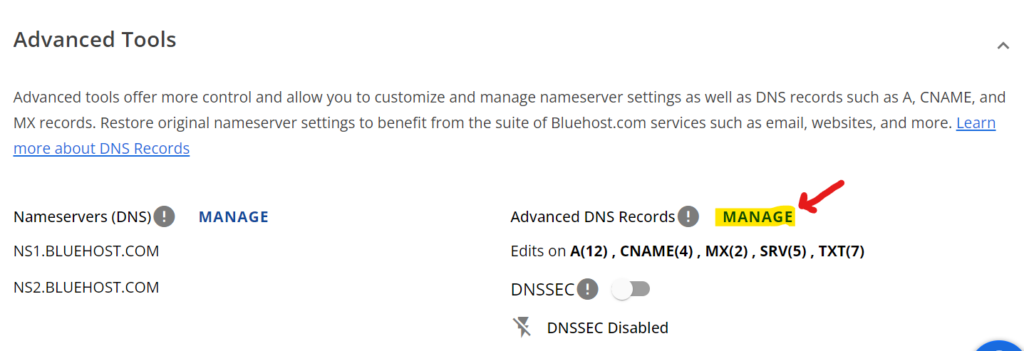
After arriving on your “Domains” page, scroll down to the “Advanced Tools” dropdown and click there.
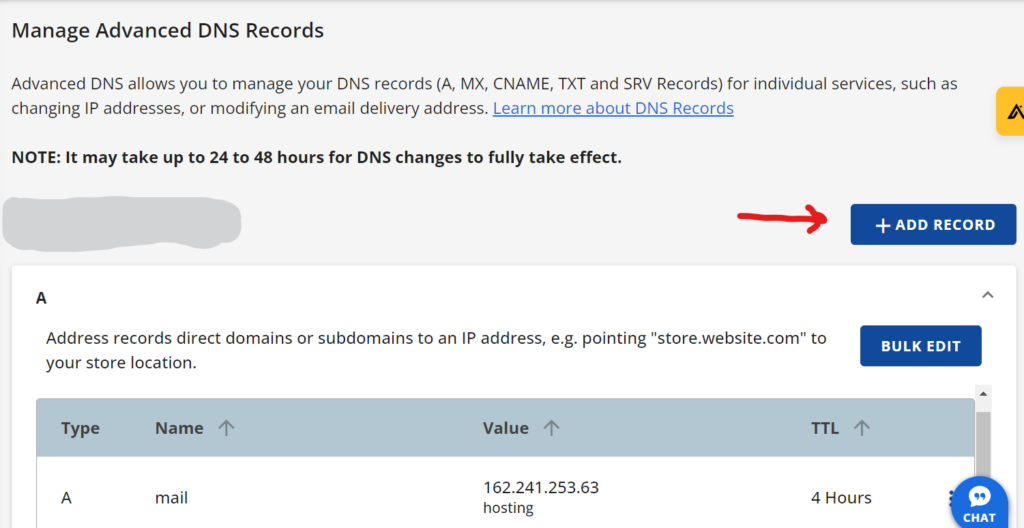
Once you open that dropdown, you will see a section called “Advanced DNS Records.” Click the “Manage” button to the right of that.
Next, you will click the “Add Record” button to add your TXT script.
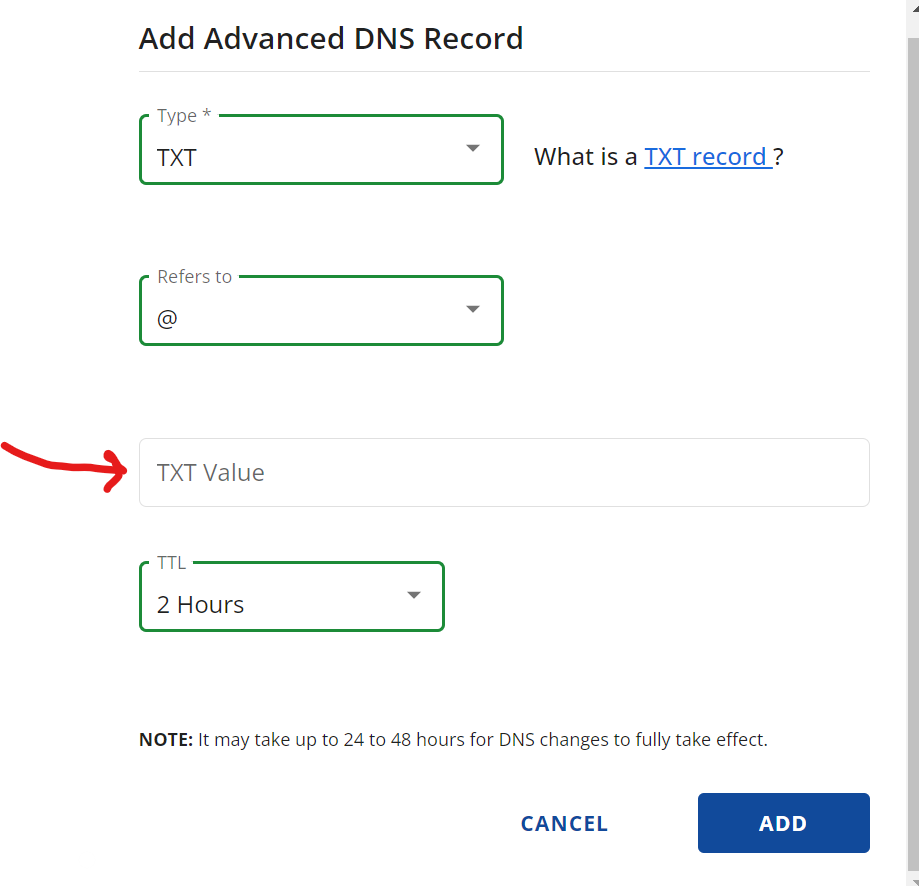
Once you are taken to the next page titled “Add Advanced DNS Record”, make sure the first field is set to “TXT” and the second one has the “@” symbol. The third field is where you will paste the TXT script you have been holding onto in your clipboard. Lastly, just select 2 hours in the TTL field.
Congrats, you are done in Bluehost! Now, wait a few hours and go back into Google Search Console and click “Verify.”
It could take up to 48 hours for your changes to be realized, so if you are not seeing verification, be patient and check back in two days.